Fires are important for many reasons when outdoors. They keep you warm, serve as light, a source for cooking, they tend to keep animals away from bothering you, the smoke can serve as a natural insect repellent, and just the calming beauty of watching them. Whether you have a roaring blaze or twinkling coals a good fire can be your best friend in the wild.
Supplies
If you are doing a non-traditional fire, using things other than matches or lighters, char cloth may be needed to help catch and nurse an ember into flame. You can buy char cloth online, but it is ver easy to make yourself.
Making your own char cloth is so easy it doesn't make much sense to buy it. Take an Altoids or similar metal tin and poke a few small holes in the top with a nail or knife. Pack it as full as you can with cotton fabric, denim works the best, but anything 100% cotton will work. Close the tin and bury it in some coals in a fire. When the fire is done, and the tine is cooled enough to handle just take it out of the fire and the cloth inside will be charred perfectly.
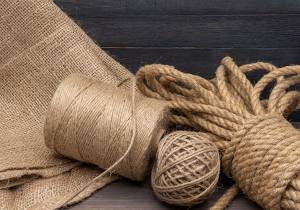
Another great tiem for starting your fire is Jute. Jute is a natural fiber twine. Take a length of the twine and unwind it into fibers and ball it up into a loose airy ball. This will be your nest for starting your fire. Once you have an ember on your char cloth, you can put that char cloth in the nest and gently blow into it. If you are using a magnesium stricker, battery and steel woll, or a magniying glass you can usually use just jute and bypass the char cloth.
Making a nest
Whether you use jute or other stringy fibers, or breakdown thicker fibers from tree bark or cattails, a nest is key to starting many primitive fires. Make your nest nice and light, if it is too packed the oxygen doesn’t flow to help catch it on fire. However, if you have the fibers too spread out then there isn’t enough material there to catch fire.
Fire by Friction
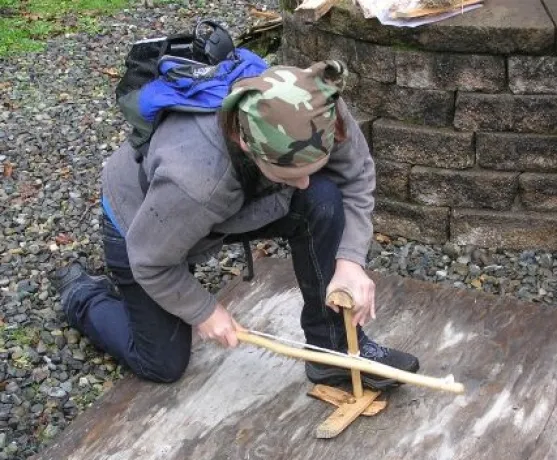
A bow drill is the most common "Fire by Friction" method. You will need a baseboard with a devot and a V cutout from the devot to the edge of the board. A spindle stick that is rounded on both ends, a block with a divot in it to hold, and a bow made from a straight to slightly bent stick and cordage. Wrap the cordage around the spindle then position things as you see in the photo. Keep solid downward pressure on the spindle with the handblock and baseboard. Move your bow back and forth vigorously, using as much of the length of the bow as possible. These take a while to get used to, a key is when you start to see some smoke DO NOT STOP, it usually take longer than you think to get that solid ember. The best types of wood for a bow drill are; cedar, basswood, cottonwood, poplar.
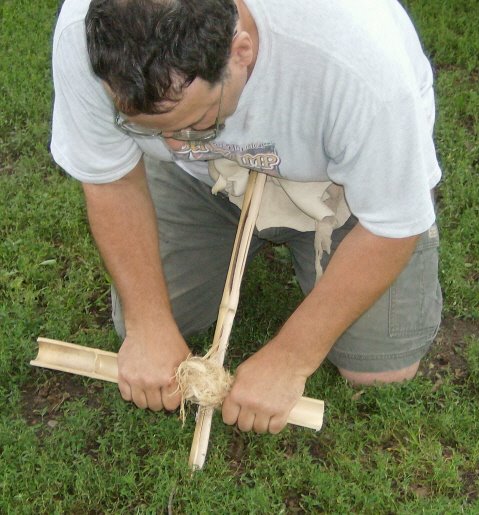
The hand drill is similar to the bow drill but without a bow. This is done with just your hands moving the spindle back and forth. The spindle is typically large as seen here. Place your hands at the top of the spindle and as you move your hands back and forth apply downward pressure. This will cause your hands to slide down the spindle, when you get low, reposition your hands to the top of the spindle. This method has less pressure involved than the bow drill so this methos is best in warmer dryer climates. The best types of wood are; cedar, basswood, yucca, or cottonwood.
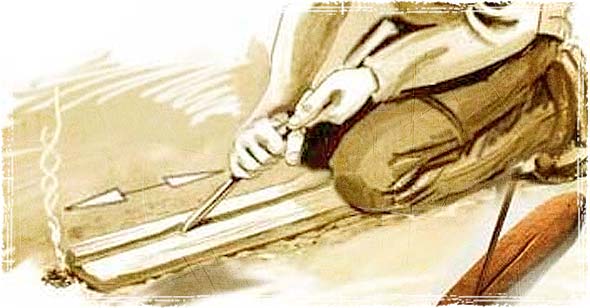
The Fire Plough is another "Fire by Friction" method. Use a baseboard with a V-cut the length of the board. Use a softwood for the base, and a hardwood for the plow stick. Slide the stick pack and forth through the trench while applying lots of downward pressure.
The Fire Plough is another "Fire by Friction" method. Use a baseboard with a V-cut the length of the board. Use a softwood for the base, and a hardwood for the plow stick. Slide the stick pack and forth through the trench while applying lots of downward pressure.
Fire by friction is challenging and exhausting, especially at first! When you start the friction, no matter the method, start slowly. You will want to get into the groove of things and a good rhythm that is fluid before adding speed. When you start to see smoke DO NOT STOP! Many folks think when they start to see smoke they have the ember, you don’t! Once you start to see the smoke that is actually the time to pick up the speed and go as fast as you can, but make sure you still keep good form. When you do have your ember it will stay hot for a bit so if you are winded take a moment to catch your breath or you will risk blowing too hard on the ember and putting it out. When your ember is in the nest blow softly, imagine your breath as a whisper, and hold the nest up in the air blowing softly from underneath.
Other firing starting methods
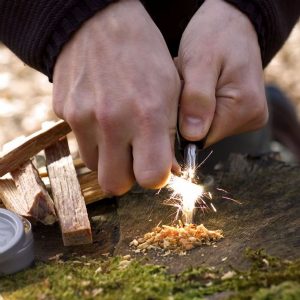
Magnesium strikers are super simple and great tools to start a quick fire. Many folks will use their knife to scrape a small pile of magnesium onto the tinder pile, but if you are using some dry jute, you can skip straight to the striking. Use the back of your knife, if it locks, to scrap hard and fast across the magnesium. Magnesium has a very low combustion point, so just the heat from the friction is enough to create the sparks to start your fire.
Flint and Steel is the classic old school way to start a fire. There are a few other rocks, mostly in the quartz family, that will spark but flint is the most common and readily available. Most of the time the steel you use will be in the form of a ring that wraps around a few fingers and is commonly known as a "Knuckle Buster". When you first start using flint and steel you are likely to learn exactly why they call it a "Knuckle Buster". When you strike the flint you will want to strike against a sharp ridge of the flint. The sharp part of the flint is imporant because what is really happening is that sharp edge of the rock is shaving off a small sliver of the steel. In the process that small sliver gets exteremly hot and that is what makes the sliver into a spark. These sparks have an incredibly short life, so you will need to use a piece of char cloth. When the spark lands on the char cloth it will extend the life by slowly burning the cloth. Now you can put that char cloth into a nest and be ready to go.
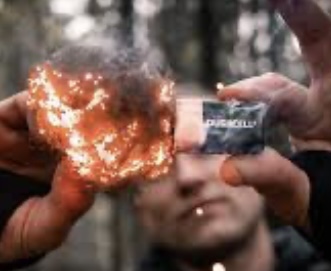
Steel wool and a 9-volt battery is a cool way to make a fire. Take the steel wool, it needs to be plain steel wool not an SOS pad with soap added, and pull it apart to a loose nest. Once you tap the two ends of the battery to the steel wool it will glow red hot and you can add it to a jute nest. The science behind this that by touching the two prongs to the steel wool you are completing an electrical circuit and that sends electricity though the wires.
Starting a fire with a magnifying glass is another fairly simple method, but it does require a nice sunny day. You will notice that there is a circle of bright light that you can make larger or smaller as you change the distance from the glass to the nest. The goal is to make the sircle of light as small as possible and hold it steady in place. If it is a sunny day, and late morning to mid-afternoon with a high Sun, it will not take too long for smoke to appear and then your nest will catch fire.